
Free Image Cropper: How to Crop Images to the Right Size and Shape
Not every image needs to be edited extensively.
Sometimes the photo itself is fine. The problem is simply that it contains more of the scene than you need.
Maybe there is too much empty space around the subject. Perhaps you need a square profile picture from a landscape photograph. Or you have a wide photograph that needs to fit into a particular space on a website.
In situations like these, cropping is often all you need.
Cropping removes unwanted areas around an image and keeps the part you actually want to use.
It sounds simple, but choosing the right crop can make a noticeable difference to how an image looks.
You also need to consider the shape of the space where the image will be used. A square profile picture, a widescreen thumbnail, and a vertical social-media image all have different proportions.
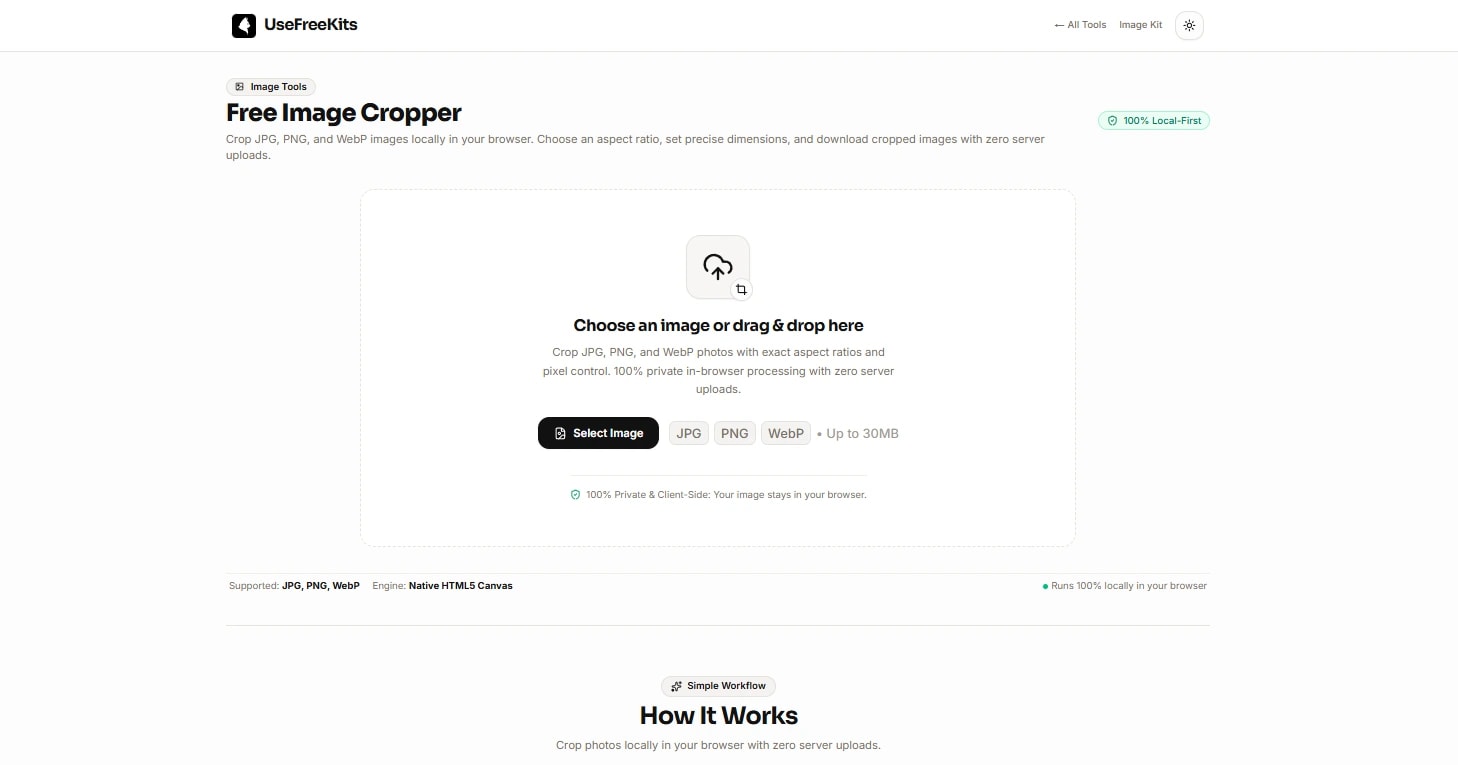
The UseFreeKits Free Image Cropper lets you crop JPG, PNG, and WebP images directly in your browser. You can choose a standard aspect ratio, use freeform cropping, adjust the crop area, and download the result without a watermark.
What is image cropping?
Image cropping is the process of removing unwanted parts of an image.
Imagine you take a photograph of a person standing in front of a building.
The original photo might contain:
The person
The building
Empty space above their head
Objects on either side
Ground below them
If you only need the person, you can crop away some of the surrounding area.
The original image might be wide, while the final version could be square or vertical.
Cropping doesn't mean changing the entire photograph.
You're simply deciding which part of the original image should remain.
Cropping vs resizing: what's the difference?
These two terms are often confused.
Cropping removes part of an image.
Resizing changes the dimensions of the image.
For example, imagine an original photograph is:
4000 × 3000 pixels
If you crop away part of the image, you might end up with:
2500 × 2500 pixels
You've removed some of the original image.
If you then resize that crop to:
1000 × 1000 pixels
you've changed its dimensions without changing the composition.
The two operations can be used together.
A common workflow is:
Crop → choose the useful area → resize if necessary
Cropping decides what is visible.
Resizing decides how large the resulting image is.
Why does the shape of an image matter?
An image isn't always going into an empty space.
Most websites and platforms place images inside specific shapes.
For example:
Profile pictures are often square
Video thumbnails are commonly widescreen
Stories and short-form videos are usually vertical
Blog headers may be wide
Product thumbnails may use square or landscape proportions
This is where aspect ratio becomes important.
What is aspect ratio?
Aspect ratio describes the relationship between an image's width and height.
For example:
1:1
means the width and height are equal.
So:
1000 × 1000
and:
500 × 500
both have a 1:1 aspect ratio.
A 16:9 image is much wider than it is tall.
For example:
1920 × 1080
is 16:9.
A 9:16 image is the opposite orientation:
1080 × 1920
This is commonly used for vertical content.
The actual pixel dimensions can change while the aspect ratio stays the same.
That's why aspect ratio is useful when you're preparing images for different layouts.
Common image aspect ratios
Here are some of the ratios you are likely to encounter.
Aspect ratio -> Common use
1:1 -> Profile pictures, avatars, product thumbnails, square posts
16:9 -> Video thumbnails, banners, landscape content
9:16 -> Stories, vertical videos, short-form content
4:3 -> Classic photography and some display layouts
3:2 -> Photography and editorial images
These aren't strict rules for every website or platform.
The requirements of the destination should always take priority.
But understanding the common ratios makes it easier to prepare an image without repeatedly guessing at its shape.
The UseFreeKits Image Cropper provides presets for these common ratios as well as freeform cropping.
When should you use a 1:1 crop?
A 1:1 crop creates a square image.
It's useful when the destination expects a square shape.
Common examples include:
Profile images
Avatars
Product thumbnails
Square graphics
Some social-media layouts
Suppose you have a 3000 × 2000 photograph.
The original is 3:2.
If you need a square version, you can't simply change the width and height independently without distorting the image.
Instead, crop the image to a square area.
For example:
2000 × 2000
This preserves the proportions of the selected area without stretching the subject.
When should you use 16:9?
16:9 is a wide format.
It's commonly associated with:
Video thumbnails
Desktop banners
Landscape video
Website headers
Presentation-style content
If you have a portrait-oriented photograph and try to force it into 16:9 without cropping, the result may not fit the space properly.
A better approach is to select the most important part of the image and crop the surrounding areas.
The UseFreeKits cropper specifically describes 16:9 as a widescreen format suitable for YouTube thumbnails and landscape desktop banners.
What is 9:16 used for?
9:16 is the vertical version of 16:9.
It works well for:
Stories
Vertical videos
Short-form video content
Mobile-first layouts
If your original photograph is horizontal, converting it to a 9:16 crop means you will need to remove a significant amount from the left and right sides.
That's why it's important to consider the subject before cropping.
If a person is standing near the center, a vertical crop may work well.
If three people are spread across the entire width of the photograph, a narrow vertical crop may not include everyone.
Why composition matters when cropping
Cropping isn't only a technical operation.
It changes what the viewer sees.
Imagine a photograph of someone standing on a beach.
The original image may show:
The person
The ocean
The sky
The sand
If you crop tightly around the person, the photograph tells a different story.
If you keep more of the surrounding beach and sky, the image gives more context.
That's why you shouldn't simply choose the required ratio and accept the first crop.
Move the crop area around and look at the result.
Ask yourself:
What should the viewer notice first?
That should usually have enough space in the crop.
How to crop a photo without cutting off the subject
A common mistake is getting too close to the subject.
For portraits, pay attention to:
Heads
Faces
Shoulders
Hands
Important objects
Text within the image
If you are cropping a person, don't let the crop accidentally cut through an important part of their body unless that is an intentional composition choice.
Similarly, if the image contains text or a product, make sure important details remain inside the crop.
A good crop should remove unnecessary space without removing useful information.
How to crop an image using UseFreeKits
The UseFreeKits Free Image Cropper is designed around a simple four-step process.
1. Select your image
You can select an image from your device or drag and drop it into the cropper.
The tool supports:
JPG
PNG
WebP
Images up to 30 MB are supported.
2. Choose your crop ratio
Once the image is loaded, choose the shape you need.
You can use standard options such as:
1:1
16:9
9:16
4:3
3:2
Or use freeform mode when you don't need to follow a fixed ratio.
If you're preparing the image for a specific platform, check that platform's current image requirements before choosing a ratio.
3. Position the crop
The crop area can be moved so that you select the part of the image you actually want.
You can also adjust the crop using the resize handles.
This is the stage where composition matters most.
Move the selection until the subject is positioned properly and unnecessary areas are removed.
4. Crop and download
Once the crop looks right, export the image.
The UseFreeKits cropper generates the cropped image directly in the browser and downloads it without adding a watermark.
Freeform cropping vs fixed aspect ratios
There are two common ways to crop an image.
Fixed ratio
A fixed ratio keeps the crop proportional.
For example, if you select 1:1, the crop remains square.
This is useful when you know exactly what shape the destination requires.
Freeform
Freeform cropping gives you more control over the shape.
This is useful when you're simply removing unwanted areas and don't have a particular platform or layout requirement.
For example, perhaps the right side of a photograph contains an object you don't want.
You don't necessarily need a standard 1:1 or 16:9 crop.
You can simply remove the unwanted area.
The UseFreeKits cropper supports both approaches.
Does cropping reduce image quality?
Cropping itself is different from image compression.
When you crop an image, you're removing pixels outside the selected area.
You're not automatically compressing the remaining image just because you cropped it.
However, the final image can have fewer pixels than the original because part of the original image has been removed.
For example:
Original: 4000 × 3000
Cropped: 2000 × 2000
The cropped version contains fewer pixels because you've removed part of the original image.
If you need a particular final pixel size after cropping, you may need to resize the result as a separate step.
This distinction is important:
Crop = change the visible area
Resize = change the dimensions
Compress = reduce file size
They solve different problems.
Cropping and image compression are not the same thing
Suppose you have a 5 MB photograph.
Cropping out half the image may reduce the amount of image data, but it doesn't mean the resulting file will automatically become tiny.
If your goal is specifically to reduce the file size for a website, email, or upload limit, you may also want to compress the resulting image.
A useful workflow can therefore be:
Crop → resize if needed → compress
Use the cropper to decide what should remain.
Then use an image compressor when the file needs to be smaller.
Keeping these tasks separate gives you more control over the final result.
What happens to transparent PNG images?
Transparency matters when you're working with logos, graphics, icons, and other images that don't have a traditional background.
If the original image contains transparency, you don't necessarily want that transparent area replaced with a solid color.
The UseFreeKits cropper supports PNG and WebP output while preserving transparency when the original image contains an alpha channel or transparent background.
That makes PNG and WebP useful choices when transparency is important.
PNG vs WebP when cropping transparent images
Both PNG and WebP can support transparency.
The right choice depends on what you're doing with the resulting image.
PNG is widely supported and commonly used for logos, graphics, screenshots, and other images where transparency matters.
WebP can also preserve transparency and is commonly used on websites.
If compatibility with a particular application or platform is important, check its supported formats before choosing the output.
How to crop an image for social media
Social platforms can use different image shapes for different types of content.
A profile image may be square.
A story may be vertical.
A video thumbnail may be widescreen.
Instead of uploading the original image and hoping the platform's automatic crop looks good, you can prepare the image yourself.
A simple process is:
Check the current dimensions or ratio required by the platform.
Open your original image.
Select the matching crop ratio.
Position the subject.
Preview the crop.
Download the result.
Upload the prepared image.
This gives you control over what part of the photograph remains visible.
Platform specifications can change, so use the current requirements provided by the platform you're publishing to.
How to crop an image for a profile picture
Profile pictures are often displayed as squares.
Start with a 1:1 crop.
Then position the person's face or logo so it remains clearly visible.
Don't crop too tightly.
Remember that many platforms display profile pictures at a relatively small size, and some may also display them inside a circular frame.
If the platform uses a circular display, keep important details away from the extreme corners of the square source image.
The cropper's 1:1 preset is designed for square uses such as avatars, profile pictures, and product thumbnails.
How to crop an image for a website
Website images don't all use the same shape.
A hero image may be very wide.
A product card may be square.
A blog header might use a landscape ratio.
Before cropping, look at the actual space where the image will appear.
If the website's image container is very wide, a tall photograph may need a wide crop.
If the image is going into a square card, use a square crop.
The important thing is to prepare the image for the space it will actually occupy rather than choosing a ratio at random.
Don't crop the original image and overwrite it
This is a small habit that can save you trouble later.
Keep your original photograph.
Then create a cropped copy.
For example:
family-photo-original.jpg
family-photo-profile.jpg
family-photo-banner.jpg
Why?
Because you may need the original composition later.
A crop designed for a profile picture may not work for a website banner.
If you overwrite the original, you'll have to find the original photograph again if you need a different composition.
Keeping the original gives you the flexibility to create multiple versions.
Common image cropping mistakes
Choosing the ratio before thinking about the subject
A 1:1 crop might technically fit your destination, but it may cut off an important part of the photograph.
Look at the subject first.
Then position the crop.
Cropping too tightly
Removing empty space can improve an image, but removing too much can make the composition feel cramped.
Leave enough room around the subject where appropriate.
Ignoring the destination
An image intended for a website banner may need a different crop from an image intended for a profile picture.
Always consider where the image will be used.
Confusing cropping with compression
Cropping removes parts of the image.
Compression reduces the amount of data used to store the image.
If you need a smaller file, cropping alone may not be enough.
Overwriting the original
Keep the original file.
Create cropped copies for specific uses.
This is especially important when you're working with photographs that may be needed in several different layouts later.
A practical example
Imagine you have a landscape photograph measuring:
4000 × 3000 pixels
You want to use it as a square profile image.
Instead of stretching it into a square, choose a 1:1 crop.
The crop might look something like:
3000 × 3000 pixels
You can then position the crop so the subject is centered appropriately.
If the destination requires a smaller image, resize it afterward.
If the resulting file is still too large, compress it.
So the complete workflow becomes:
Original photograph
↓
Crop to 1:1
↓
Resize if required
↓
Compress if required
This is often better than trying to solve all three problems with one operation.
Does cropping add a watermark?
No.
The UseFreeKits Image Cropper downloads cropped images without watermarks. The tool is also described as free to use without signup and with unlimited cropping.
That means the resulting image isn't stamped with a service logo simply because you used the cropper.
Is image cropping done on a server?
The UseFreeKits Image Cropper processes images locally in your browser using the browser's native HTML5 Canvas functionality.
The tool states that images are not uploaded to a server and that processing happens locally on your device.
This can be useful if you're working with personal photographs or images that you don't want to send to an external image-processing service.
As with any tool, if you're handling confidential company material, follow your organization's own data and privacy requirements.
Why browser-based image cropping can be convenient
You don't always need a full photo-editing application just to crop an image.
If the task is simply:
"I need this photo to be square."
or:
"I need to remove this part of the image."
a browser-based cropper can be enough.
You can open the tool, select the image, make the crop, and download the result.
There's no need to learn a complicated editing interface for a task that only takes a few seconds.
When should you use an image cropper?
An image cropper is useful when:
You need a square profile picture
You want to prepare a social-media image
A website requires a particular image ratio
You need a banner or thumbnail
A photograph contains unnecessary empty space
You want to focus attention on a particular subject
You need to remove an unwanted part of an image
You want to create different versions of the same photograph
If your goal is to change brightness, remove an object, retouch a photograph, or apply complex effects, you'll need a more advanced image editor.
A cropper is designed to do one thing well: control which part of the image remains.
Crop JPG, PNG, and WebP images with UseFreeKits
If you need a quick way to crop an image without installing editing software, the UseFreeKits Free Image Cropper provides the basic controls needed for everyday cropping.
You can drag and drop or select a JPG, PNG, or WebP image up to 30 MB, choose a standard aspect ratio or freeform crop, position the selection, and download the result.
The processing takes place locally in your browser, and the downloaded image doesn't contain a watermark.
Frequently Asked Questions
What is image cropping?
Image cropping removes unwanted areas from an image so that only the selected portion remains.
Does cropping resize an image?
Not necessarily. Cropping removes part of the image, while resizing changes its dimensions. The two operations can be performed separately.
What is aspect ratio?
Aspect ratio describes the relationship between the width and height of an image. Common examples include 1:1, 16:9, 9:16, 4:3, and 3:2.
What is a 1:1 image?
A 1:1 image is square because its width and height are equal. It is commonly used for profile pictures, avatars, and square thumbnails.
What is 16:9 used for?
16:9 is a widescreen format commonly used for video thumbnails, landscape content, and wide website banners.
What is 9:16 used for?
9:16 is a vertical format commonly used for stories and vertical short-form video content.
Can I crop JPG images?
Yes. The UseFreeKits Image Cropper supports JPG images up to 30 MB.
Can I crop PNG images?
Yes. PNG is supported, including images that contain transparency. PNG output can preserve transparent areas.
Can I crop WebP images?
Yes. WebP is supported by the UseFreeKits Image Cropper.
Can I crop an image to a custom size?
Yes. The tool supports precise dimensions as well as standard aspect ratios and freeform cropping.
Does the cropper add a watermark?
No. The downloaded cropped images don't contain a watermark.
What is the maximum image size?
The cropper supports JPG, PNG, and WebP images up to 30 MB.
Are my photos uploaded to a server?
The tool states that image processing happens locally in your browser with zero server uploads.
Can I crop an image without signing up?
Yes. UseFreeKits describes the Image Cropper as free to use without signup.
Final thoughts
Cropping is one of the simplest ways to improve an image for a particular purpose.
You don't always need to edit the entire photograph. Sometimes the image is already good-you just need to decide which part should remain.
The most important thing is to think about where the image will be used.
A profile picture may need a square crop. A video thumbnail may need a widescreen crop. A story may need a vertical crop. A website banner may need a much wider composition.
Once you know the required shape, choose the appropriate aspect ratio and position the crop around the important part of the image.
And remember that cropping, resizing, and compression are different things.
Crop when you need to change the composition.
Resize when you need different dimensions.
Compress when you need a smaller file.
Keeping those three jobs separate makes image preparation much easier.
If you need a quick way to crop JPG, PNG, or WebP images directly in your browser, try the free UseFreeKits Image Cropper.